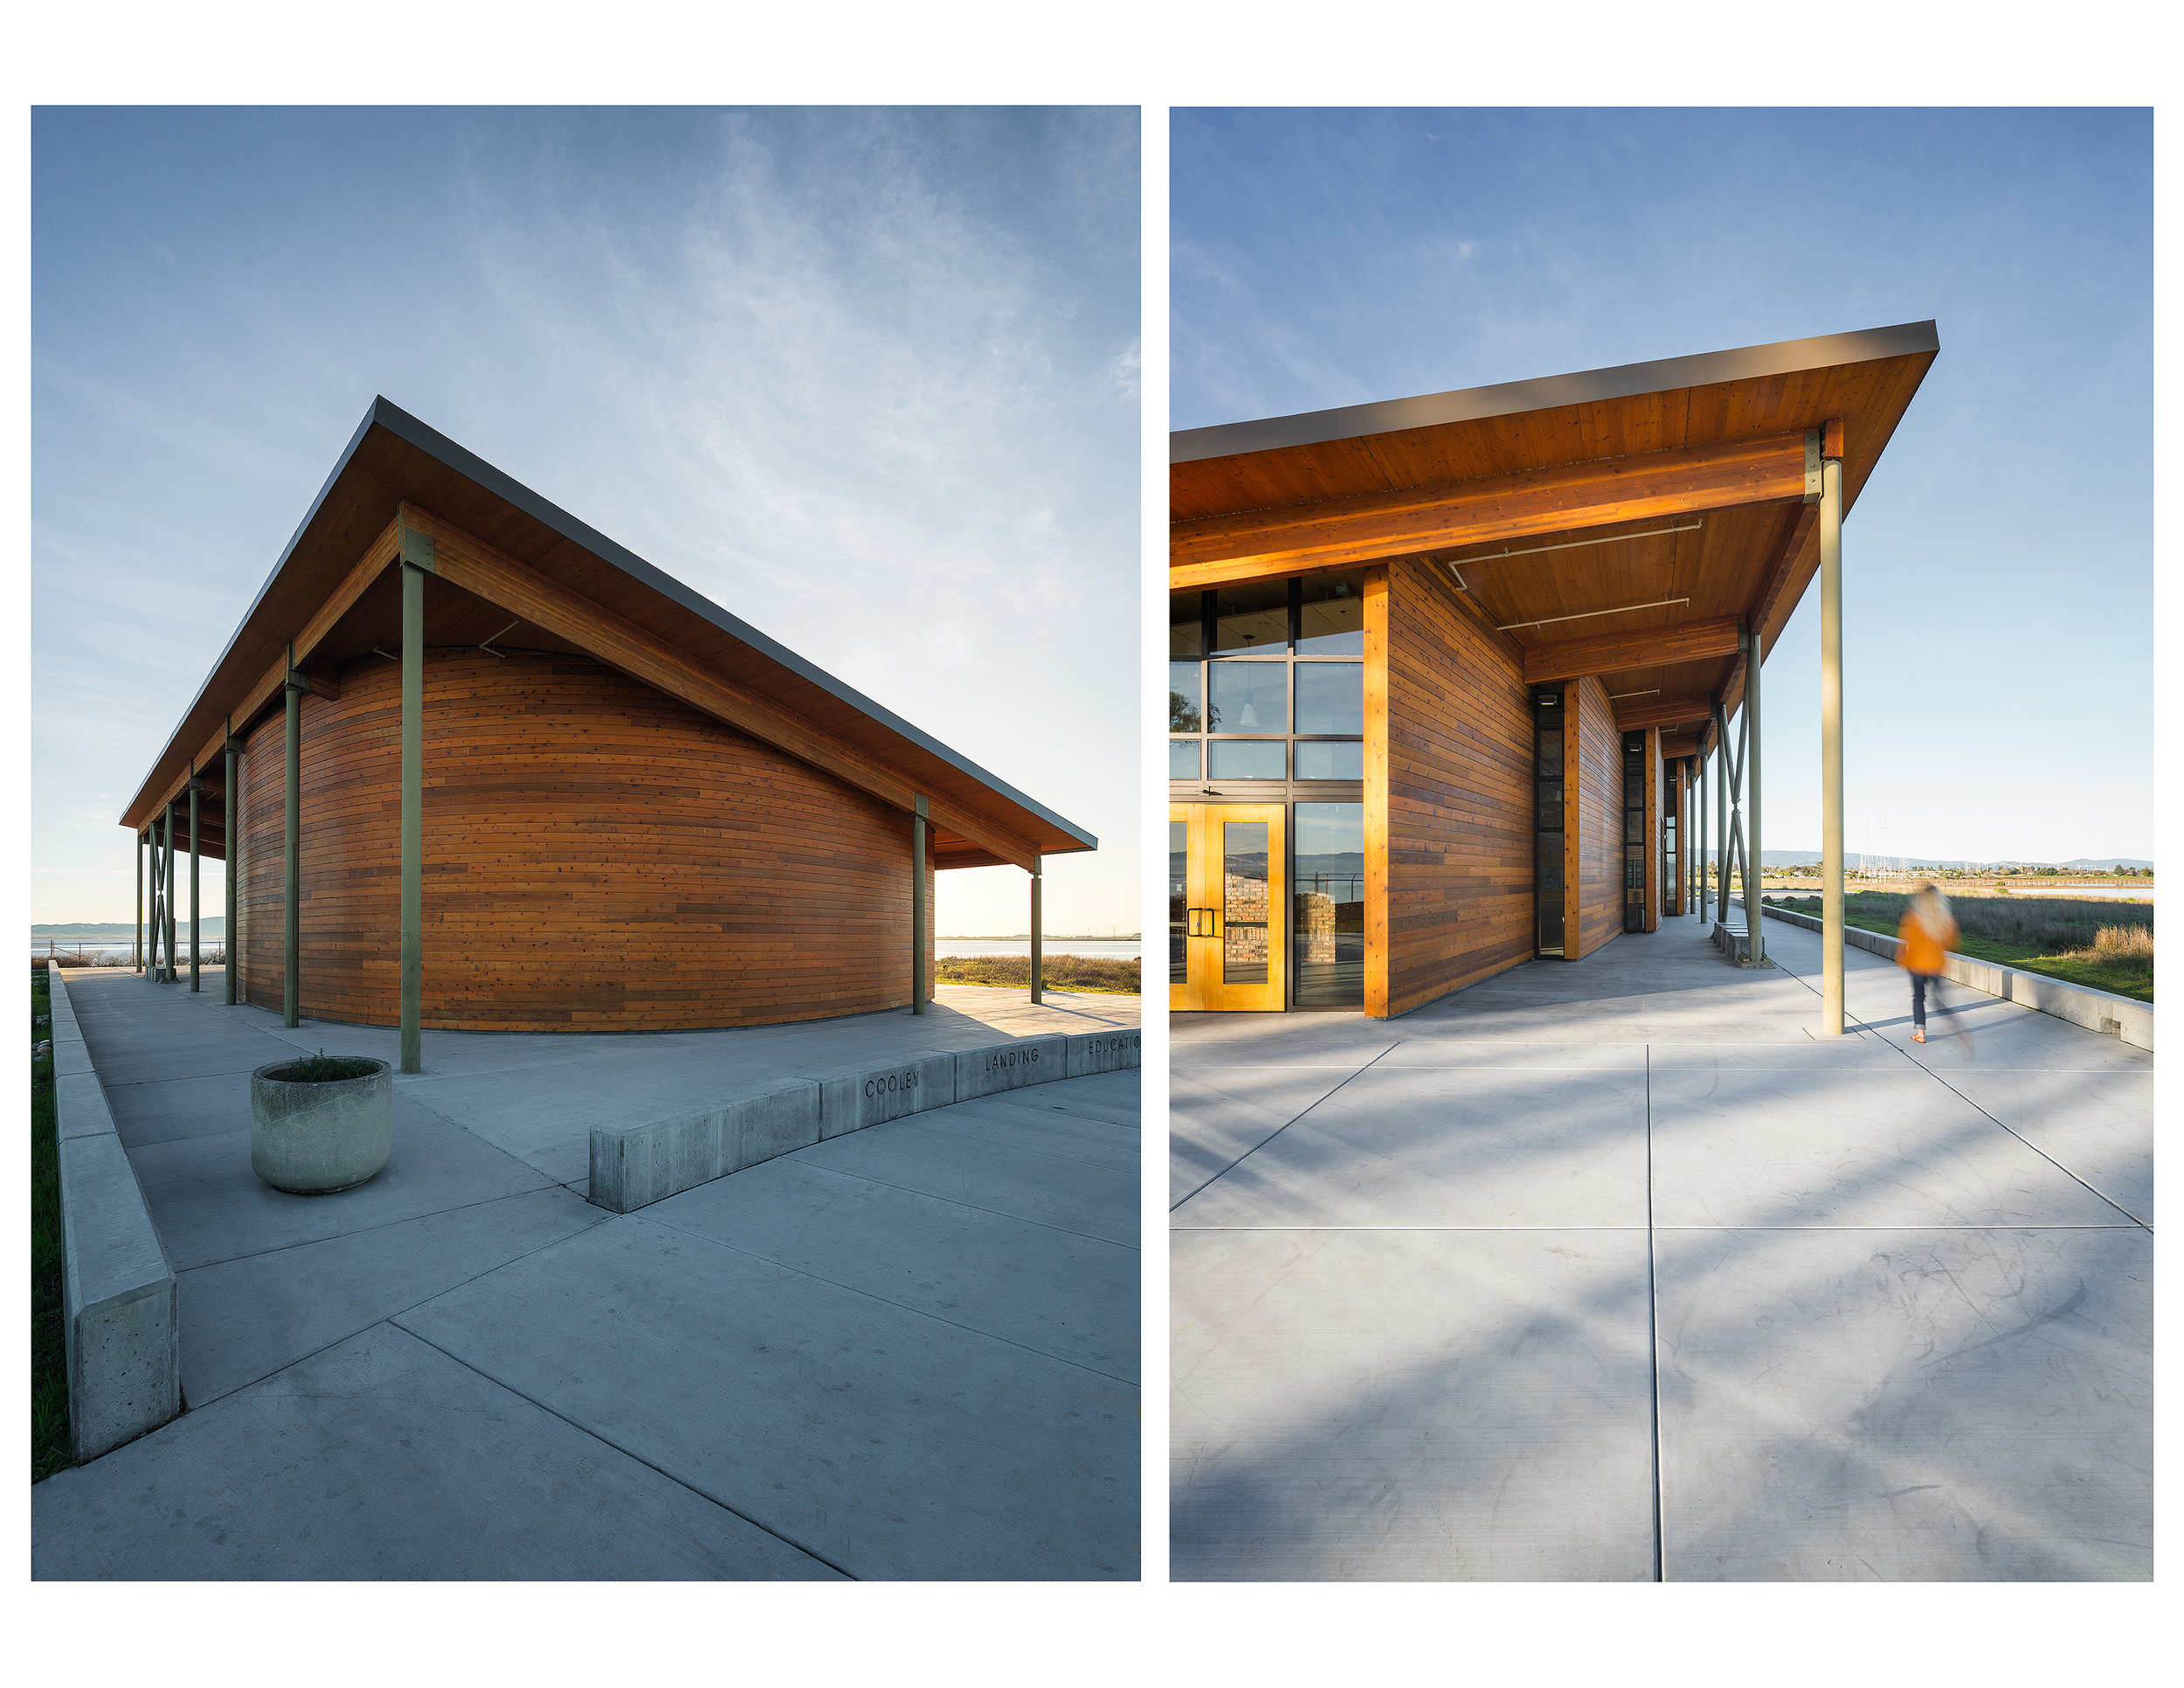
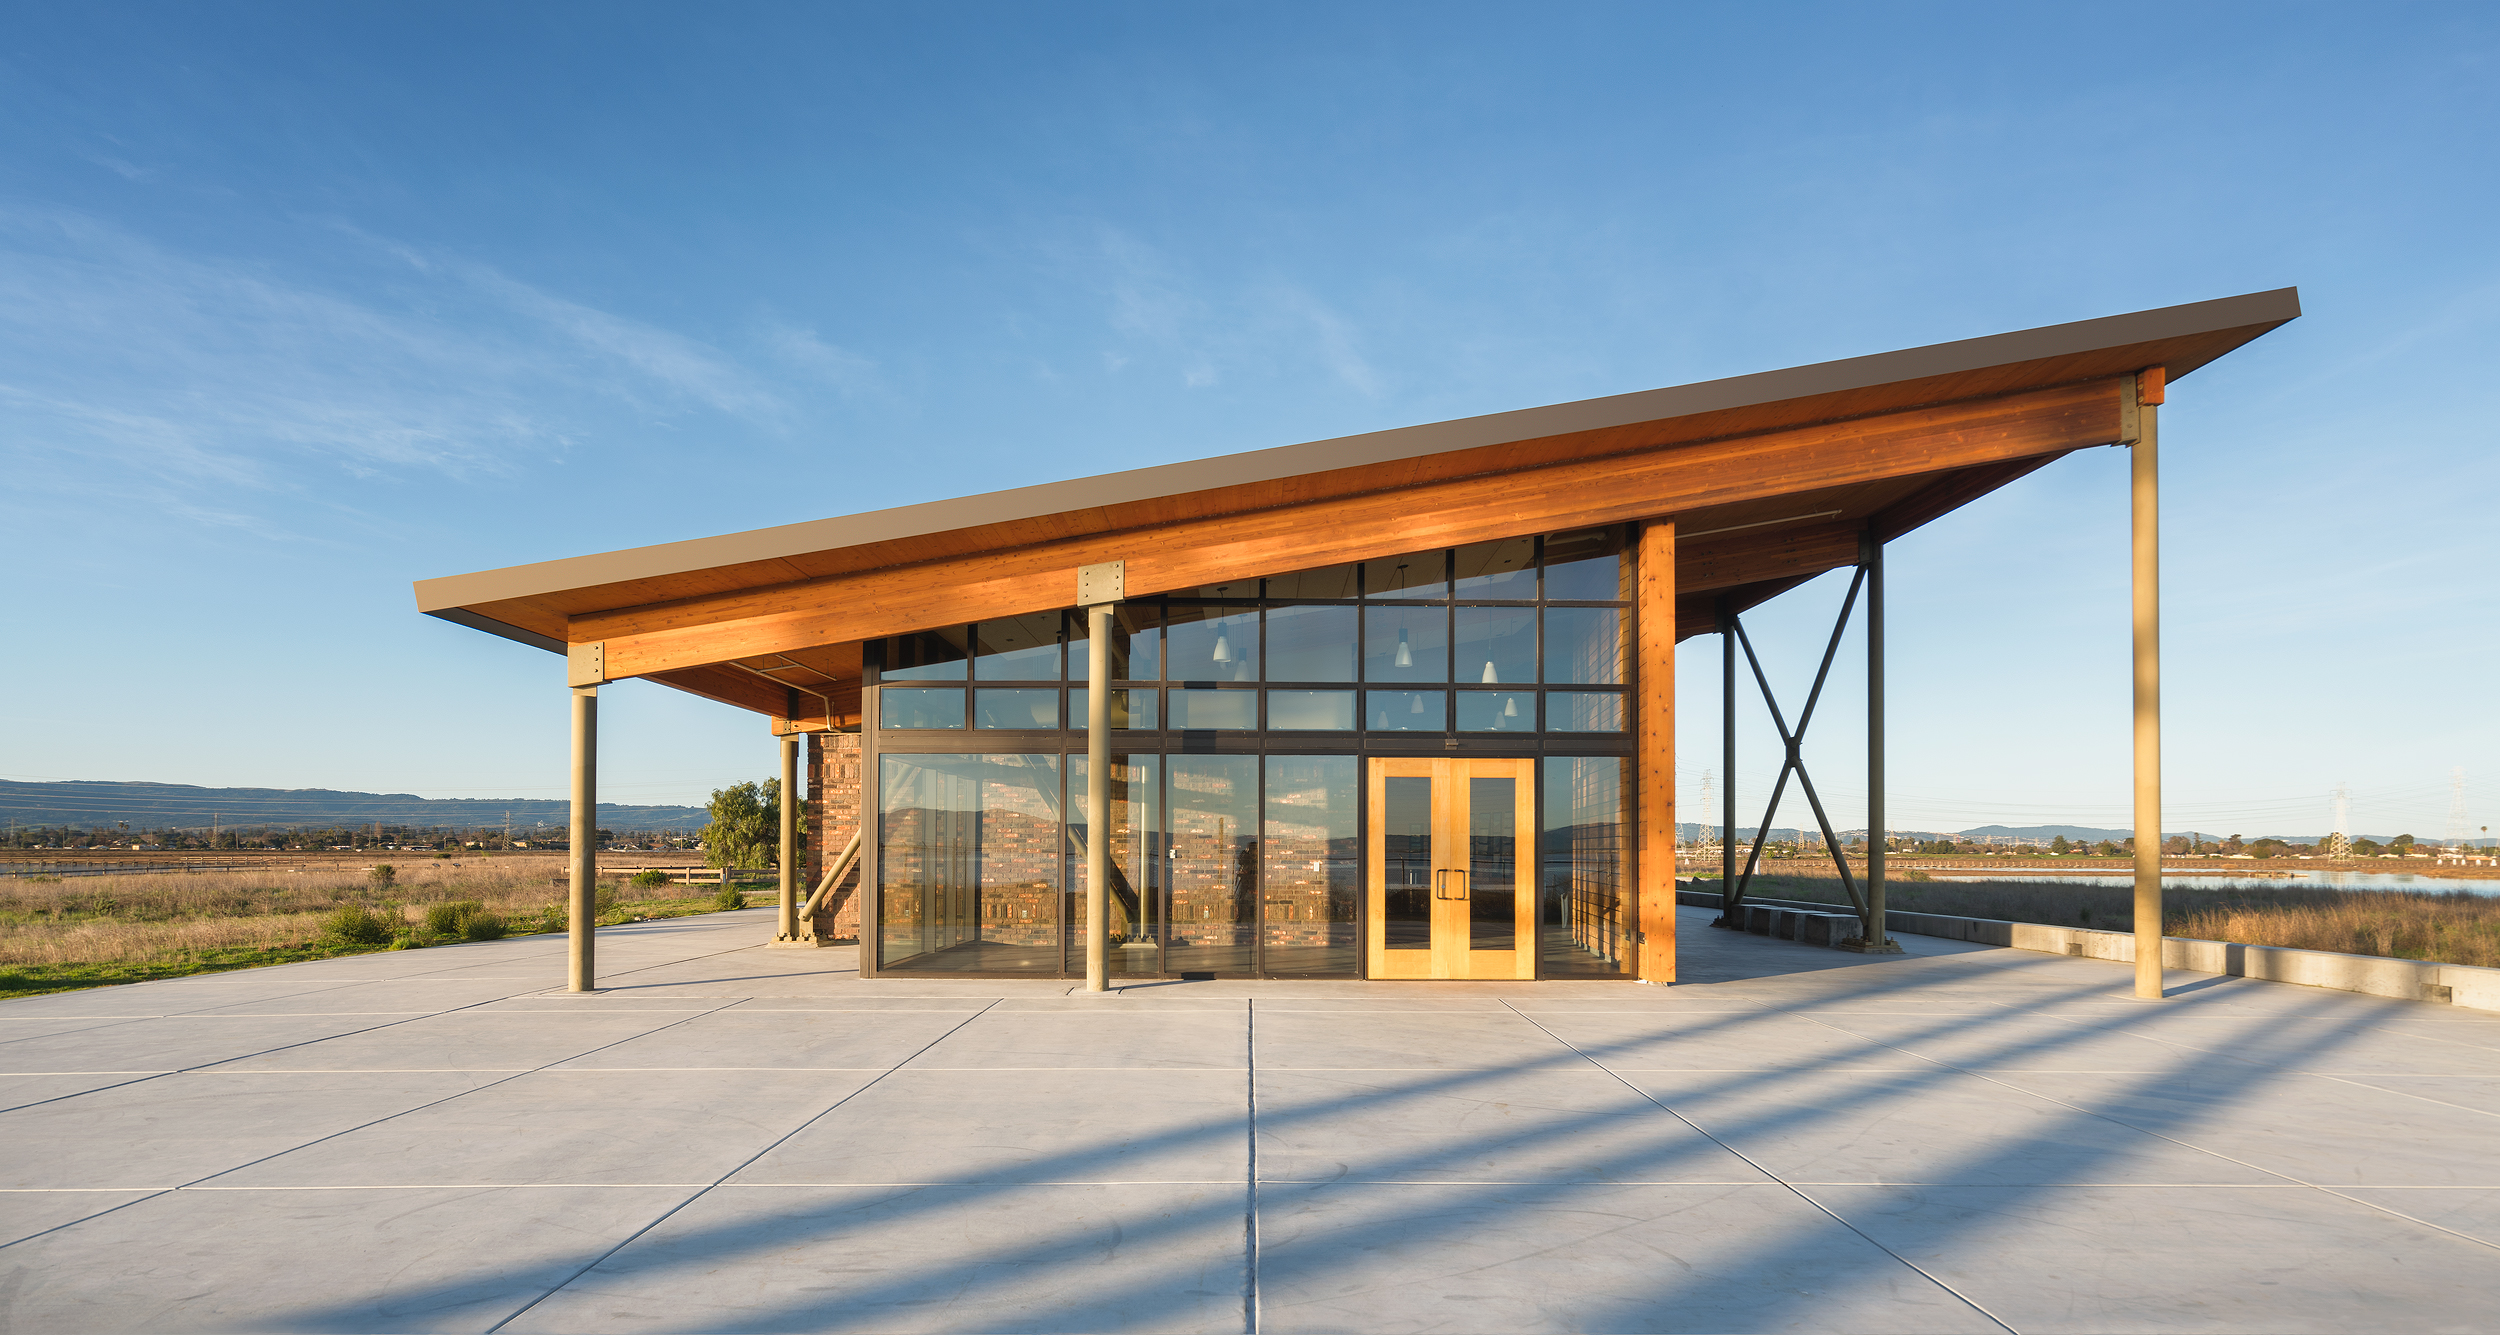
Cooley Landing Education Center

First post of the new year! I've had my eye on the Cooley Landing Education Center designed by FOG Studio Architects for quite sometime now. After seeing the images from the popular site Dezeen , I felt there was a lot of room for improvement. After some planning around the sun and its location relative to the site, I settled on a sunrise shoot with minimal cloud cover. I waited until after the sun had risen to allow for the unfiltered golden light to wash over the building and surrounding landscape.
I love the monolithic appearance this building has in a otherwise flat landscape. The wood work and shape pay homage to old masted ships and the brick represents the "ravenswood" brick factory in this location during the 19th century. Originally, this site was a landfill and in 2012 California State Parks Program awarded $5 million to the City of East Palo Alto to revitalize the area. This improvement was spread out over four phases and during phase three, FOG Studio Architects was awarded the contract to design an educational building. (To learn more about the design process, click here)
I look forward to hopefully working for Fog Studio on more projects!


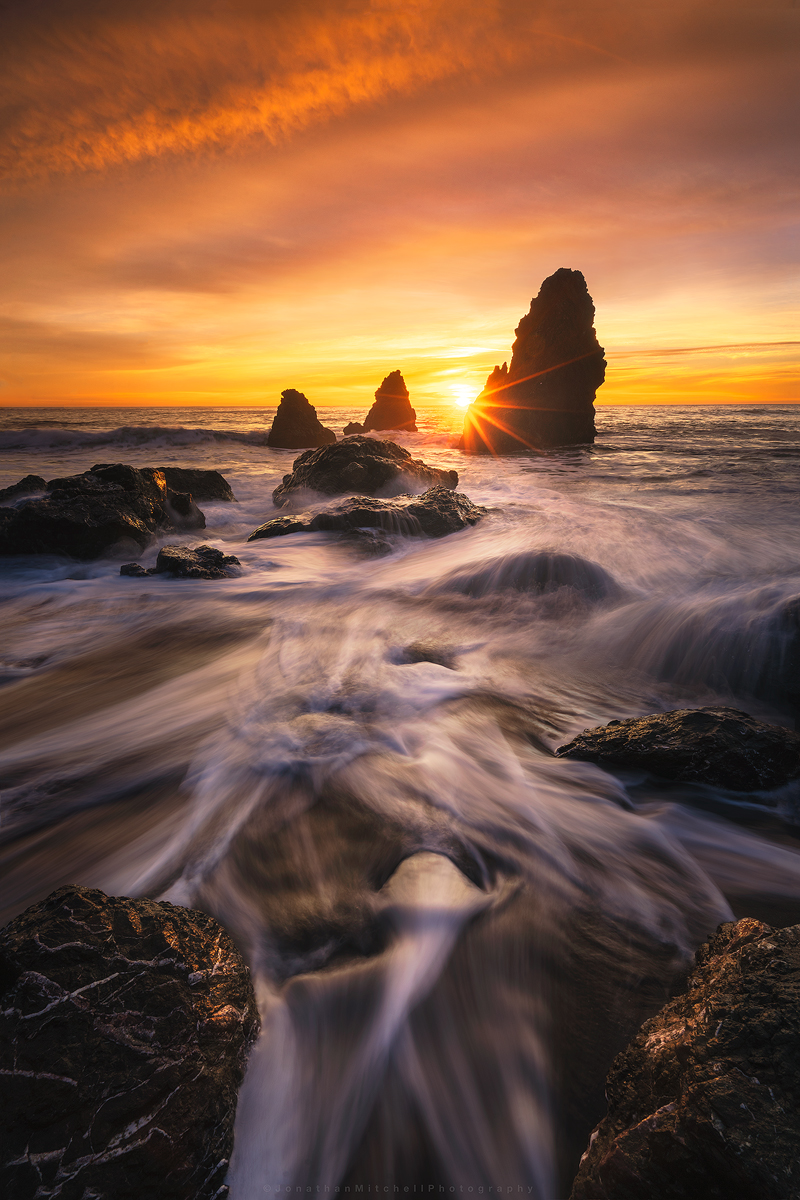
About this Shot: Rodeo Star
I'm starting a new series on my site called About This Shot where I share my thoughts behind my Landscape, Architecture, and Timelapse photos.

One of the first seascapes I ever captured was at Rodeo Beach a number of years ago (pictured left). Cronkite/ Rodeo Beach is a popular beach in the Bay Area and the sea stacks are among the best to photograph. During the winter time, high tides pull a lot of the sand off the beach and expose interesting rock patterns. Compositions are endless here and I think this is why it attracts so many photographers.
I've shot here over 20 times and each time achieved a different result. One of the keys to photography that I've learned is to pre-visualize your shot. I knew I wanted to use the exposed rocks and water flow as my foreground but deciding when to shoot the sky was the challenge. I arrived about 40 minutes before sunset to asses what state the beach was in. After spending 10 minutes watching the water flow I settled on this composition.
The Original Images:
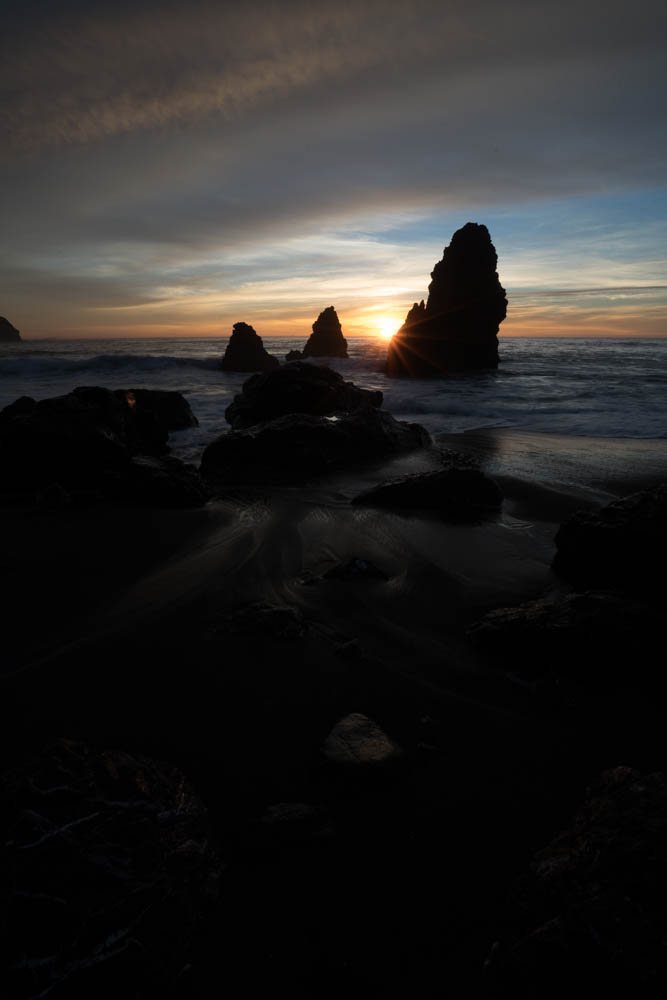

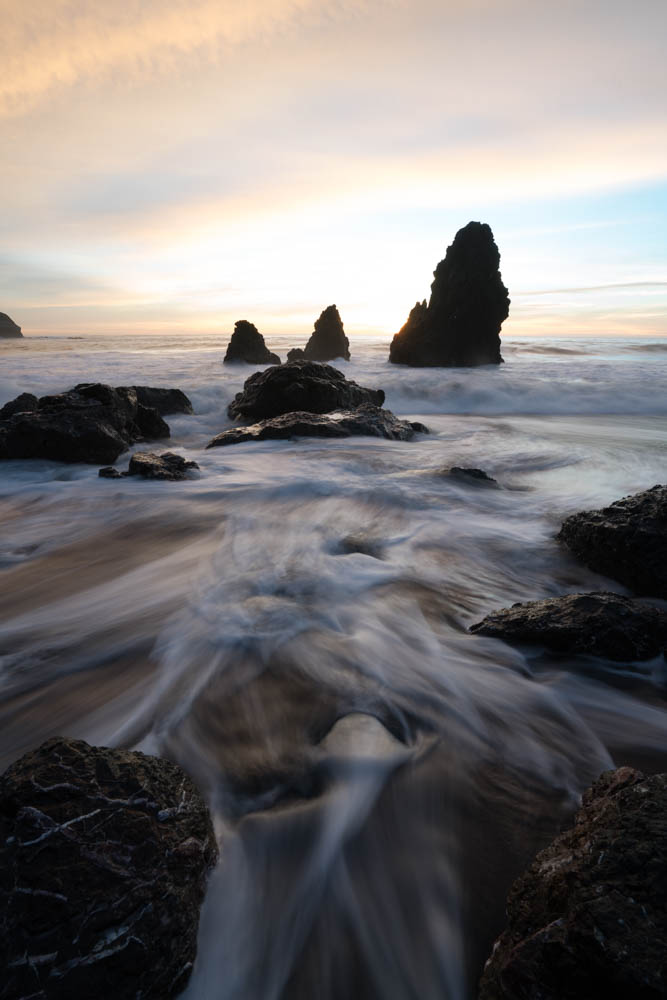
After looking over all the photos taken that night I selected the three shown above. One for the sunburst/sky and two for the water movement. The water in the foreground helps lead your eye to the sea stacks then out to the horizon. I start by applying basic edits like highlights/shadows, exposure balance, and some minor color adjustments to each of the images. I then export them out of Lightroom into photoshop as smart objects. Smart objects allows me to make micro adjustments once they are in a single file. Sometimes when you stack images you have to tweak the edits a little in order for them to blend correctly.
Once this is done I begin to work on adding more depth to the image by “painting light”. Creating both light and dark masks, I can target specific areas of the image to help move your eye through the scene. Lastly, there was a large blue hole that formed which distracted from the image. Using the clone tool I used various parts of the image to lightly fill that area in. I finished it off by cropping down and sharpening for various online outlets.
I hope you enjoyed this read and I look forward to sharing more posts like this!
Equipment used:
Sony a7rii
Sony 16-35f4
Induro ct-213 Carbon 8x
Adobe Lightroom/ Photoshop
-
February 2018
- Feb 20, 2018 Afternoon at UC Davis Feb 20, 2018
- Feb 2, 2018 Cooley Landing Education Center Feb 2, 2018
-
December 2017
- Dec 18, 2017 Szabo Ranch House drone footage Dec 18, 2017
-
November 2017
- Nov 28, 2017 Before & After- Twilight Photography Nov 28, 2017
-
September 2017
- Sep 12, 2017 About this Shot: Rodeo Star Sep 12, 2017
- Sep 1, 2017 Real Estate vs Architectural Photography Sep 1, 2017
-
August 2017
- Aug 23, 2017 About This Shot: Tufa Arrival Aug 23, 2017
-
April 2016
- Apr 13, 2016 Rhino Motion in Iceland Apr 13, 2016