About this Shot: Rodeo Star
I'm starting a new series on my site called About This Shot where I share my thoughts behind my Landscape, Architecture, and Timelapse photos.

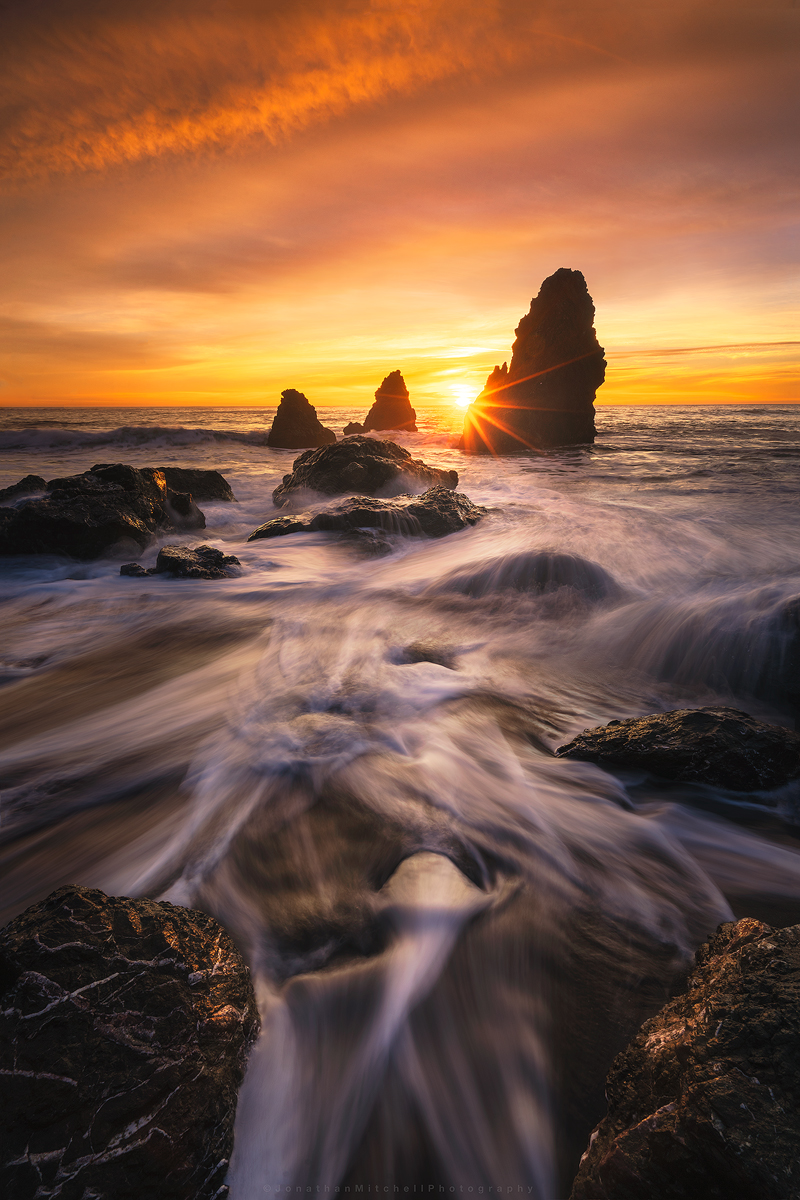
One of the first seascapes I ever captured was at Rodeo Beach a number of years ago (pictured left). Cronkite/ Rodeo Beach is a popular beach in the Bay Area and the sea stacks are among the best to photograph. During the winter time, high tides pull a lot of the sand off the beach and expose interesting rock patterns. Compositions are endless here and I think this is why it attracts so many photographers.
I've shot here over 20 times and each time achieved a different result. One of the keys to photography that I've learned is to pre-visualize your shot. I knew I wanted to use the exposed rocks and water flow as my foreground but deciding when to shoot the sky was the challenge. I arrived about 40 minutes before sunset to asses what state the beach was in. After spending 10 minutes watching the water flow I settled on this composition.
The Original Images:
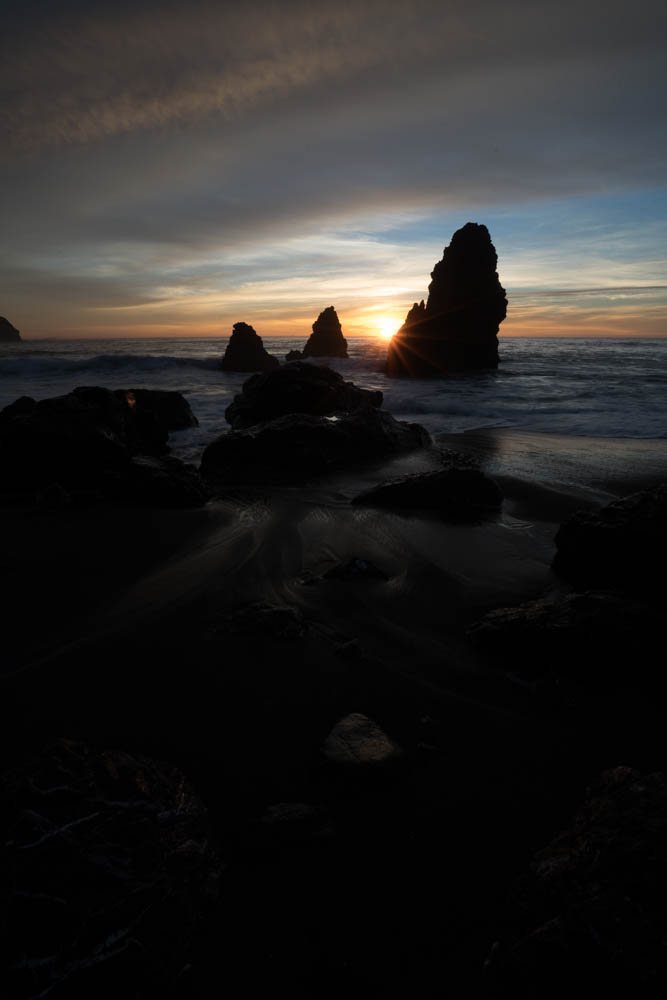

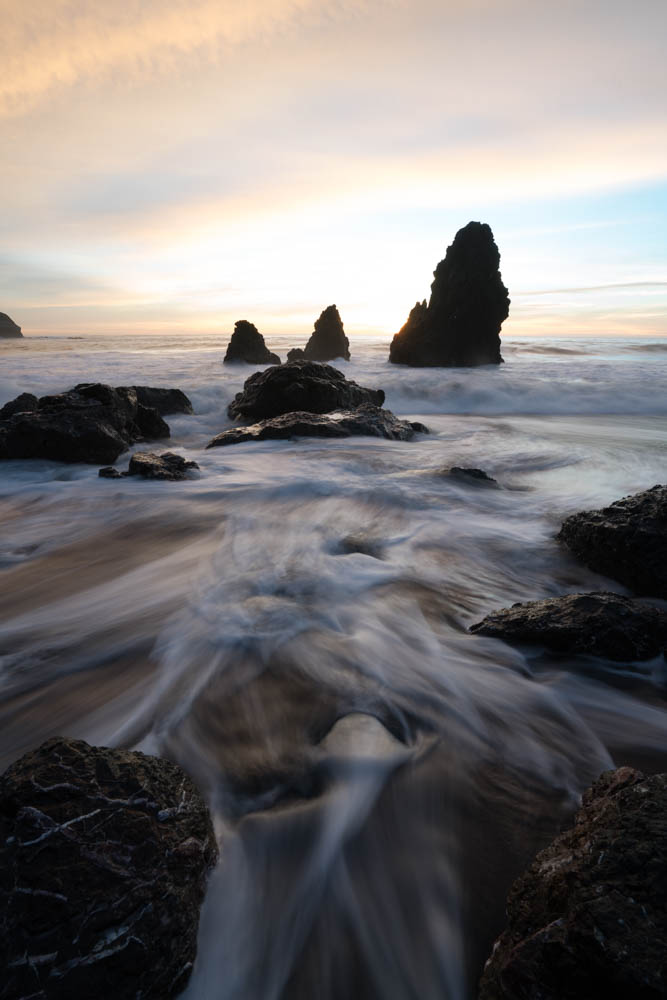
After looking over all the photos taken that night I selected the three shown above. One for the sunburst/sky and two for the water movement. The water in the foreground helps lead your eye to the sea stacks then out to the horizon. I start by applying basic edits like highlights/shadows, exposure balance, and some minor color adjustments to each of the images. I then export them out of Lightroom into photoshop as smart objects. Smart objects allows me to make micro adjustments once they are in a single file. Sometimes when you stack images you have to tweak the edits a little in order for them to blend correctly.
Once this is done I begin to work on adding more depth to the image by “painting light”. Creating both light and dark masks, I can target specific areas of the image to help move your eye through the scene. Lastly, there was a large blue hole that formed which distracted from the image. Using the clone tool I used various parts of the image to lightly fill that area in. I finished it off by cropping down and sharpening for various online outlets.
I hope you enjoyed this read and I look forward to sharing more posts like this!
Equipment used:
Sony a7rii
Sony 16-35f4
Induro ct-213 Carbon 8x
Adobe Lightroom/ Photoshop
Real Estate vs Architectural Photography
I was recently hired to shoot a new home construction in Mill Valley, CA. The builder told me they had some Real Estate photos done but they didn't quite capture the space like they had hoped.
This short post explains some of the differences between Real Estate photos and Architectural photos and my thinking behind my final images. I'm not calling out the Real Estate photographer or faulting his work. Since I have been in both situations I can relate to how quickly you need to shoot spaces and turn that work around. I am simply sharing my thoughts on why, as an Architectural photographer, my eye sees spaces differently and explain how I create more compelling images.
Let's first start with this living room shot.
On top is the Real Estate photograph and below is my shot. Typically with Real Estate photos, the photographer is trying to emphasize how large the room is and thus shoots with an extremely wide lens. Objects become very distorted and not to scale with the rest of the room. The couch circled in red is a prime example. The edge of the couch is more than twice the size of the chair sitting across from it. Other examples of extreme wide angle distortion can be seen in the trusses, the table to the left, and the far room which is too small to make out what is back there.
In contrast, I chose to shoot this with my 24mm tilt-shift lens. 24mm is still wide enough to capture the room but provides very little distortion. I moved the camera forward in the scene and positioned it as if you were sitting on the couch. The Architect (OXB STUDIO) obviously spent a lot of time thinking about how the spaces interact with each other and created a central courtyard which the living room, dining room, and guest bedroom all look out at. By opening the door next to the fireplace and the large slider in the family room, I allowed the eye to move through the scene without interruption.
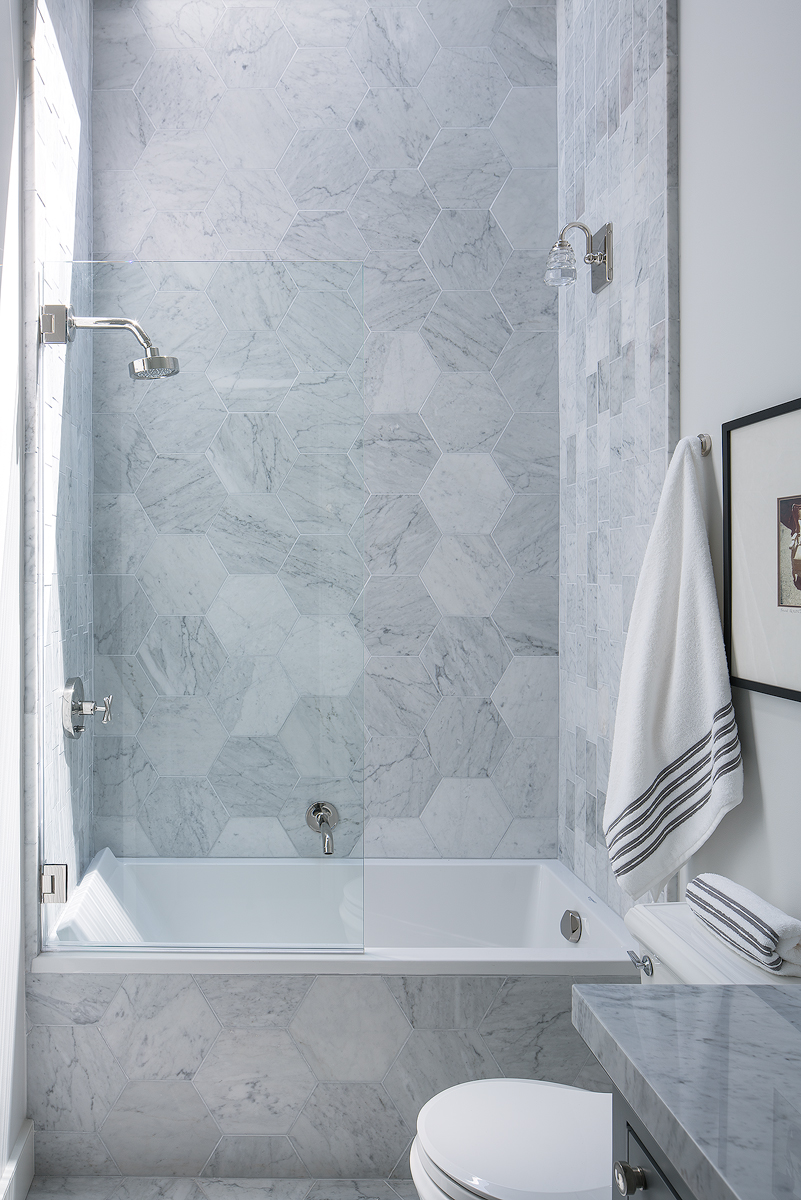
The wide angle lens strikes again. Above is the Real Estate shot for this beautiful guest bathroom. We can see that it is trying to show the vanity, toilet, shower, and size of the room. While this is a fine shot to help sell the home, here is why it doesn't work as an architectural image.
The second photo shows my take on this bathroom and why it's crucial to learn how light interacts with each home. A lot of thought is put into the placement of windows and special features like skylights, and at certain times of the day they can produce a profound effect. For this shot, I continuously checked on the bathroom, waiting for the exact time to take advantage of the light streaming in and used only natural light to illuminate the space. I set the camera up in the doorway and "shifted" the lens to the right slightly to eliminate the door while still keeping the 1 point perspective. I purposely cut off the sink and toilet because your eye will naturally fill that space in with those objects. I pulled much of the color cast out in post as I wanted this image to feel modern and clean.
*Some background on this shoot. When I book a shoot I ask for a minimum of 4-6 hours on location and for larger homes 8-12 hours. Many might say well that seems like way more time than you need to get some shots. How hard can it be? While the RE photographer only has maybe an hour to get his shots in before he/or she needs to move on to the next home, I on the other hand have more time to think about light, composition, and space. This allows us to time shots which might have been missed otherwise.
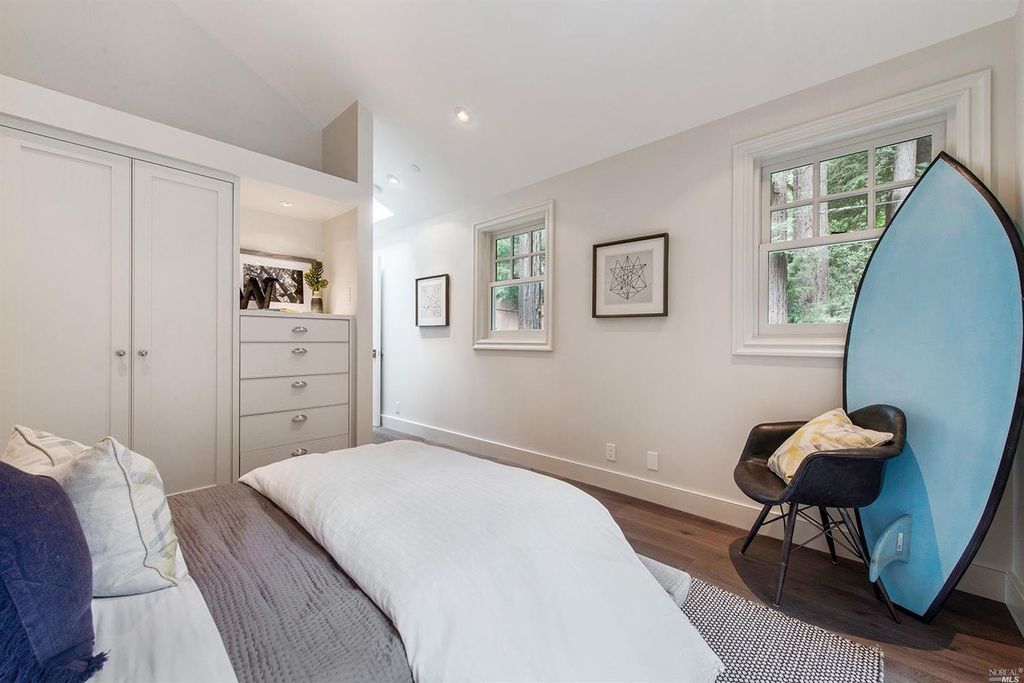
My last example covers one of the guest bedrooms in the house. When we scouted, the builder mentioned that they spent a lot of time and effort on the built-ins throughout the bedrooms. I chose to do a one-point perspective here as I felt it was the most powerful. The rug, floor, bed, and light all direct your eye through the image- first stopping at the built-ins and then moving on to the far room. We moved a dark, heavy couch from the family room and placed the Eames chair that was previously in the bedroom at the end of the frame, slightly off camera, to break up the white wall which helped to show scale and give an end point for the eye.
I hope this brief breakdown has given you some insight into my thinking behind these shots and the differences between Real Estate Photography and Architectural Photography. As I take on more and more projects I will continually update this blog with my thoughts. More photos can be seen below.
Links listed below:
-
February 2018
- Feb 20, 2018 Afternoon at UC Davis Feb 20, 2018
- Feb 2, 2018 Cooley Landing Education Center Feb 2, 2018
-
December 2017
- Dec 18, 2017 Szabo Ranch House drone footage Dec 18, 2017
-
November 2017
- Nov 28, 2017 Before & After- Twilight Photography Nov 28, 2017
-
September 2017
- Sep 12, 2017 About this Shot: Rodeo Star Sep 12, 2017
- Sep 1, 2017 Real Estate vs Architectural Photography Sep 1, 2017
-
August 2017
- Aug 23, 2017 About This Shot: Tufa Arrival Aug 23, 2017
-
April 2016
- Apr 13, 2016 Rhino Motion in Iceland Apr 13, 2016