Before & After- Twilight Photography
Mill Valley Residence- Richardson Architects
Twilight photographs are some of my favorite photos to create. It takes a lot of my landscape knowledge and applies it to architecture photography. When shooting landscape during a sunset or even under the Milky Way you are constantly capturing the environment in all types of light.
These type of photographs have both an artistic and functional aspect. By combining multiple photographs throughout sunset and blue hour I can capture the different stages of light on the home. I then "enhance" the light that is already there by using a GL-1 Hotlight and painting it on the scene as if the house lights are spilling out onto the landscape.
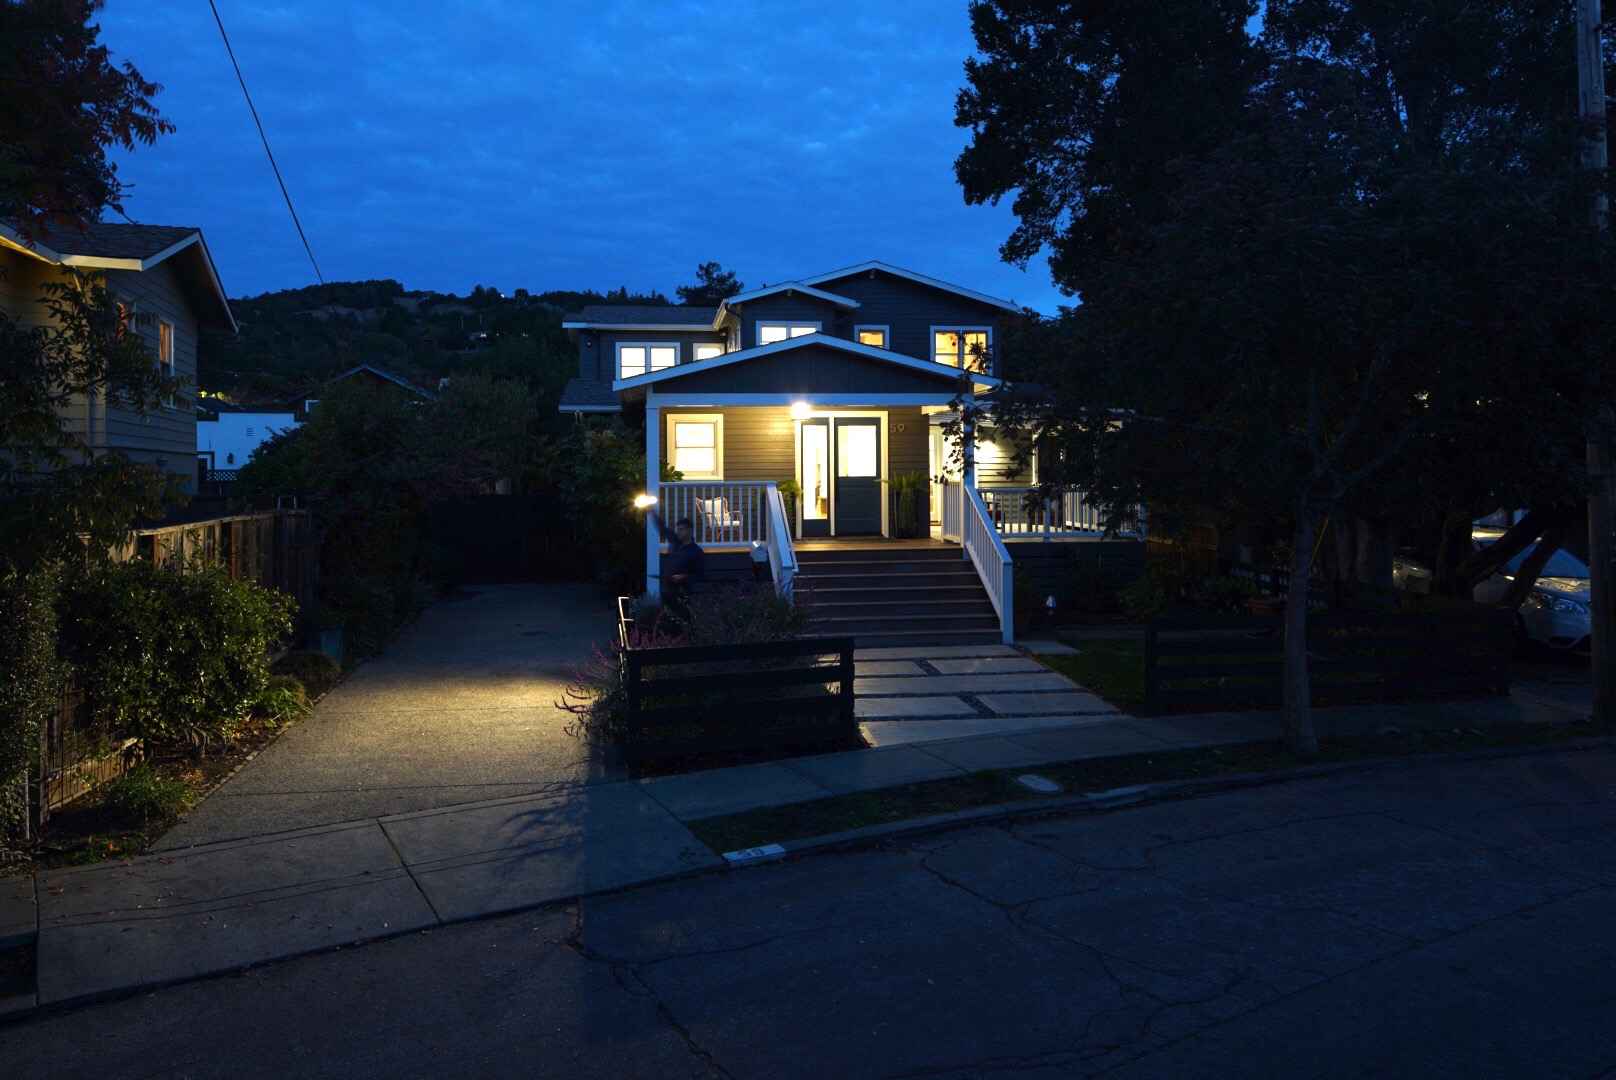
The image above is from a recent shoot with Richardson Architects based in Mill Valley, CA. Some challenges we faced while scouting our night shot was that the tree in the front yard was blocking most of the home. A one point perspective was out of the question for this reason. Moving to the left fixed this issue but there was just too much driveway in the frame. Since the second story was set back many of the views from the street were too low. As we moved back to the other side of the street we could begin to see the entire home. I set the camera on the tripod and extended up about 2-3 feet above my head and saw this was going to be our composition. Since I don't own a tripod this tall I moved my Jeep over and placed it on the hood (see photo below).
As sunset approached I began shooting multiple exposures until it got completely dark. I use an iPad connected through wifi on the camera to trigger the shutter remotely. This gives me the freedom to walk around with my GL-1 Hotlight and "paint" light into the scene where I think it works best.
The series of images below are the culmination of shots taken that night. I then layered all these in photoshop to create the final image.
This is the base image I worked from. I exposed for the lights on the interior and built from there.
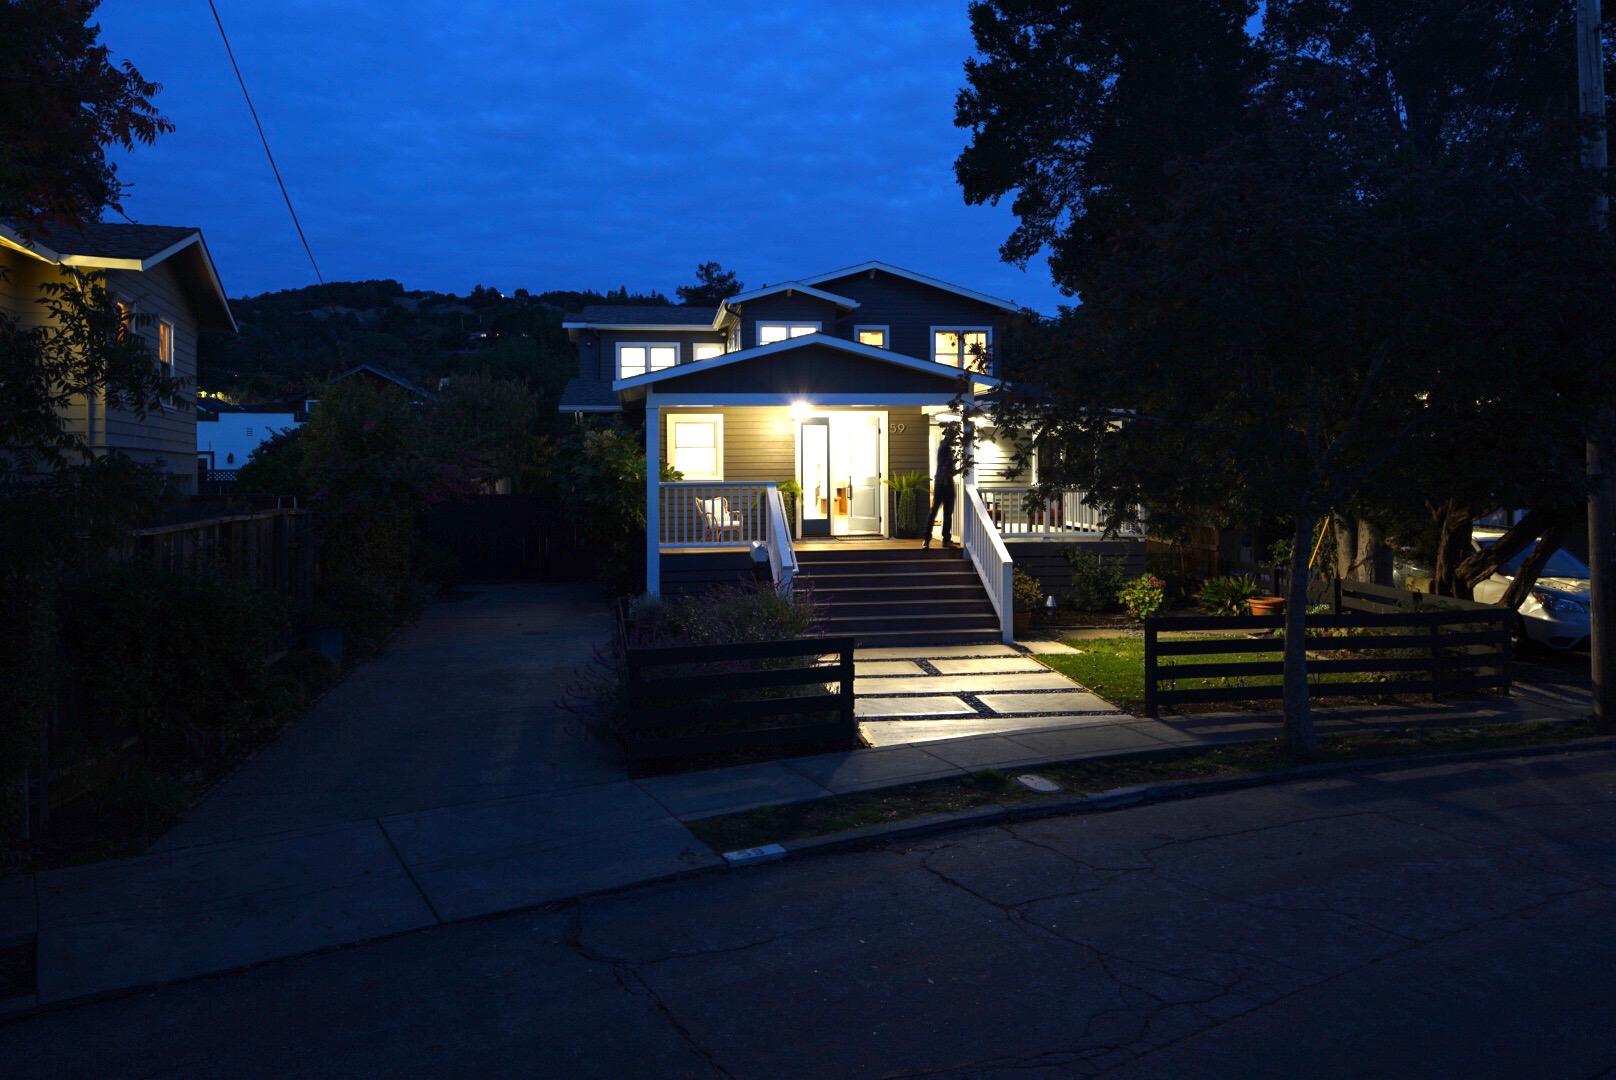
Here I have applied the 10 or so light painted layers to create the feeling that the house lights are spilling out onto the landscape.
Here I have made color and exposure adjustments to bring out the sky and surrounding landscape.
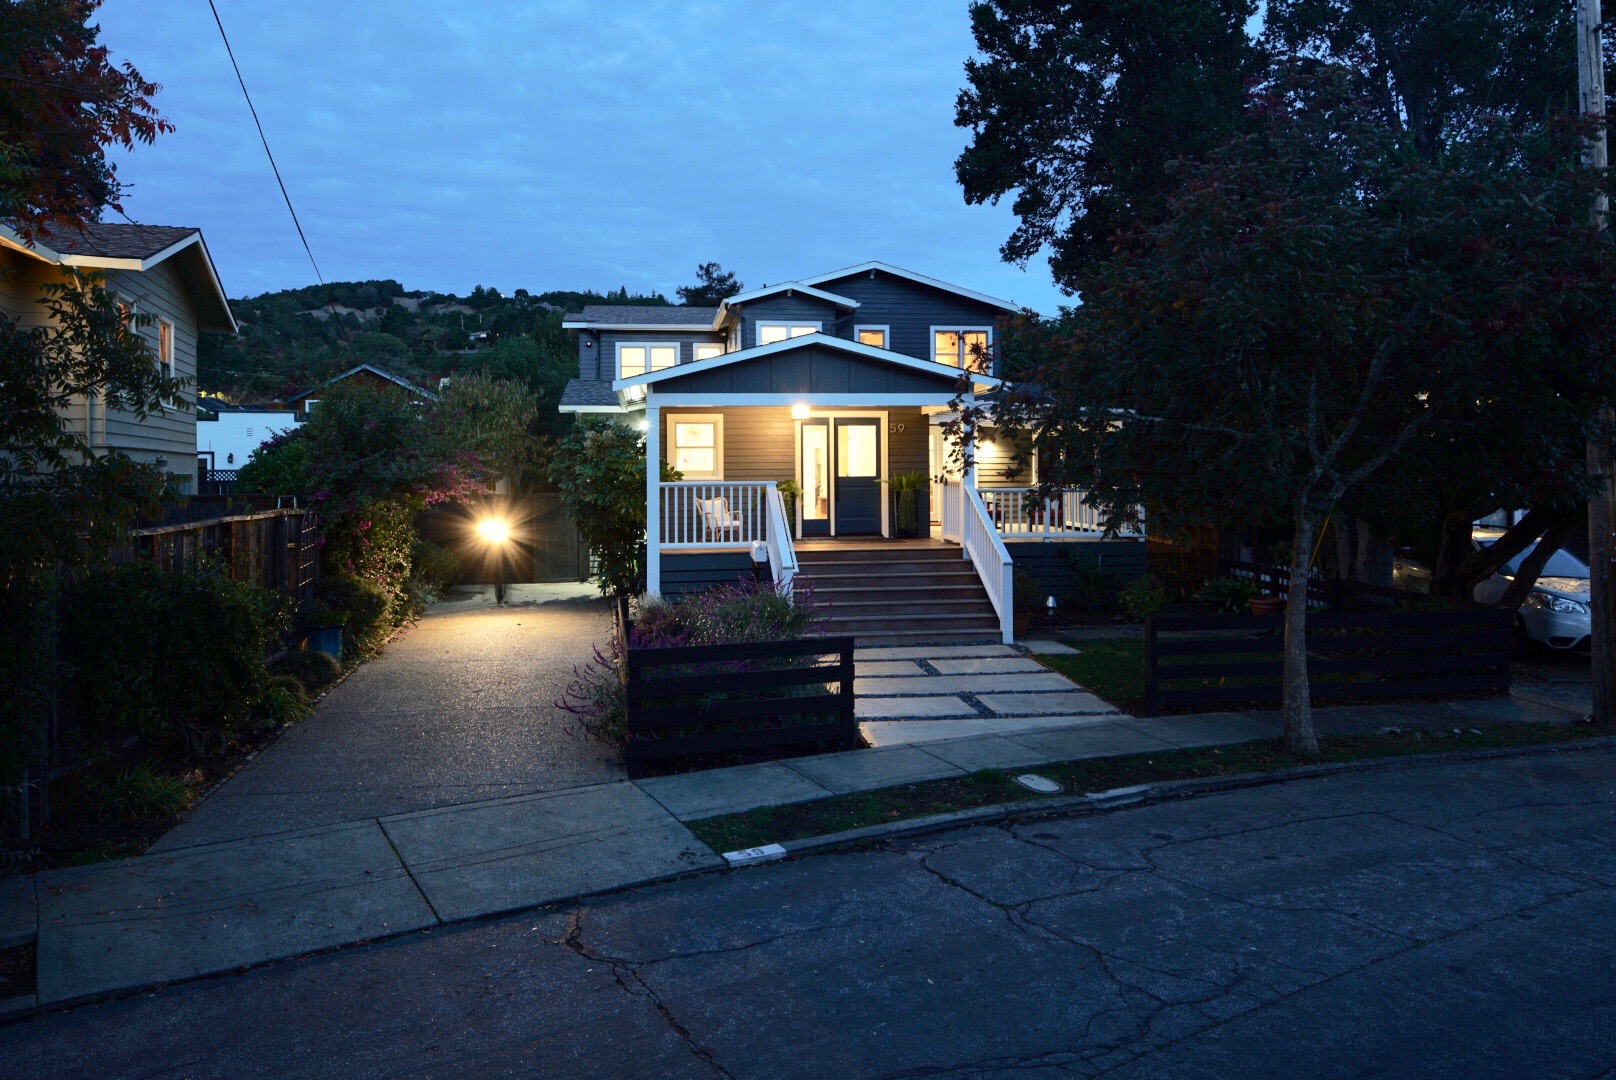
The road was a mess of cracks and patches. I decided to spend the extra time and clone them out. I also replaced the grass between the sidewalk and street as it was patchy and distracting.
Here is the final image after some more color correction and exposure adjustments. More cloning was done to remove the houses on the left and the car in the neighbors driveway.
About this Shot: Rodeo Star
I'm starting a new series on my site called About This Shot where I share my thoughts behind my Landscape, Architecture, and Timelapse photos.

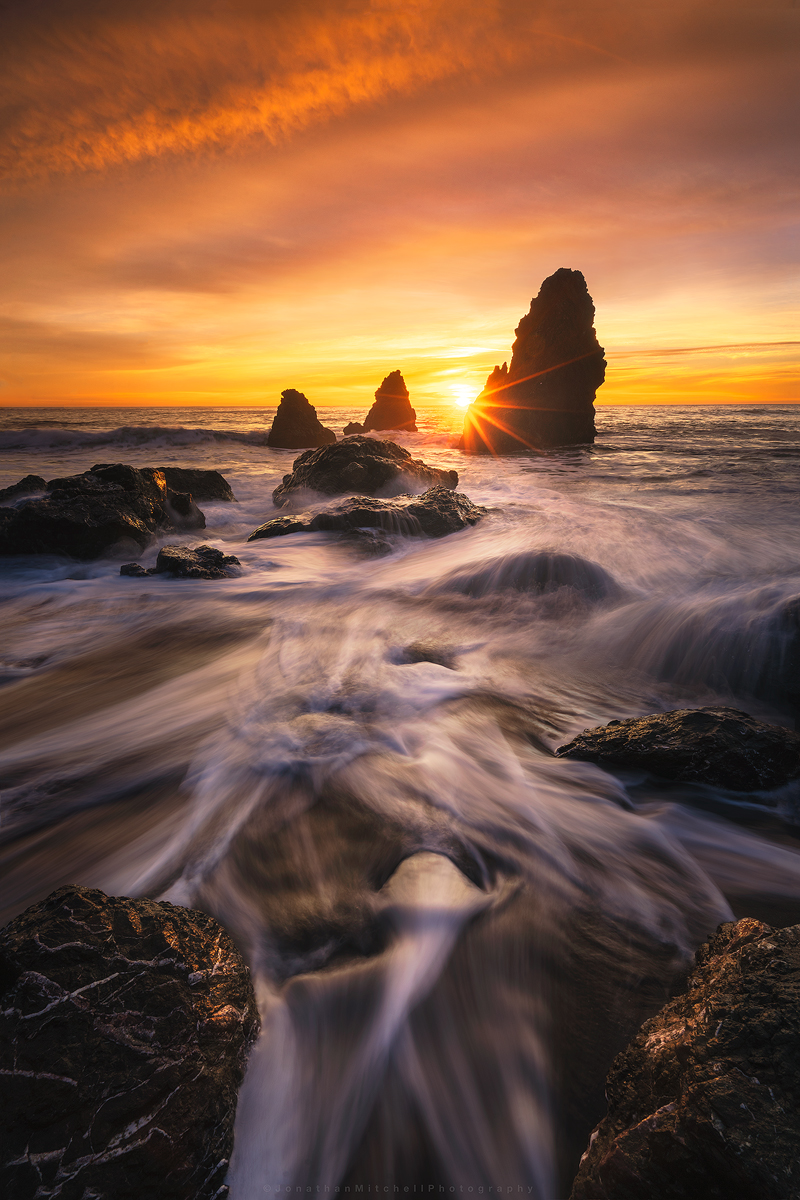
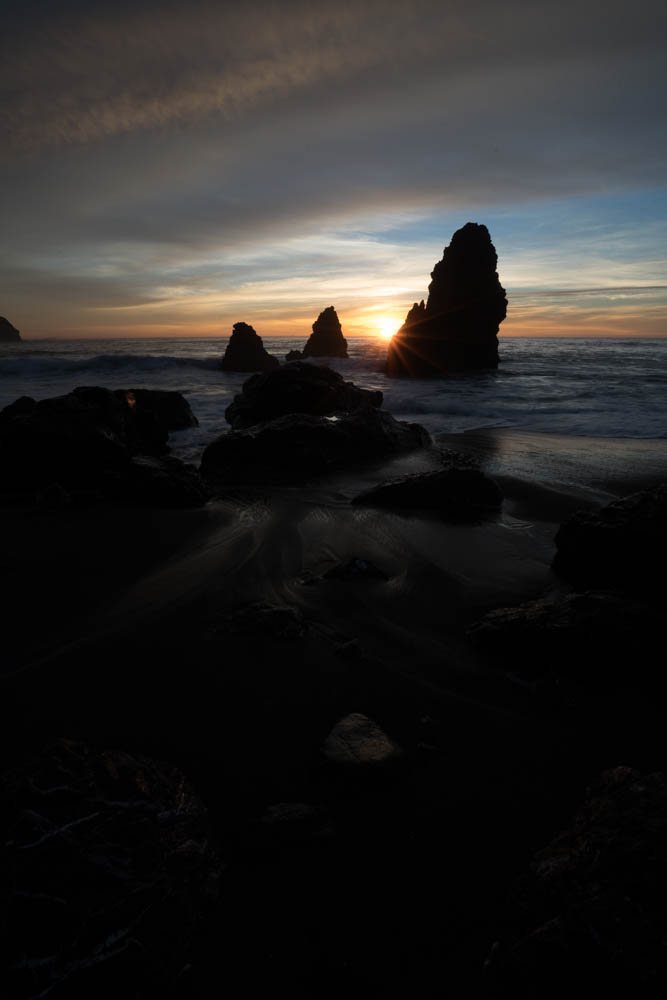
One of the first seascapes I ever captured was at Rodeo Beach a number of years ago (pictured left). Cronkite/ Rodeo Beach is a popular beach in the Bay Area and the sea stacks are among the best to photograph. During the winter time, high tides pull a lot of the sand off the beach and expose interesting rock patterns. Compositions are endless here and I think this is why it attracts so many photographers.
I've shot here over 20 times and each time achieved a different result. One of the keys to photography that I've learned is to pre-visualize your shot. I knew I wanted to use the exposed rocks and water flow as my foreground but deciding when to shoot the sky was the challenge. I arrived about 40 minutes before sunset to asses what state the beach was in. After spending 10 minutes watching the water flow I settled on this composition.
The Original Images:

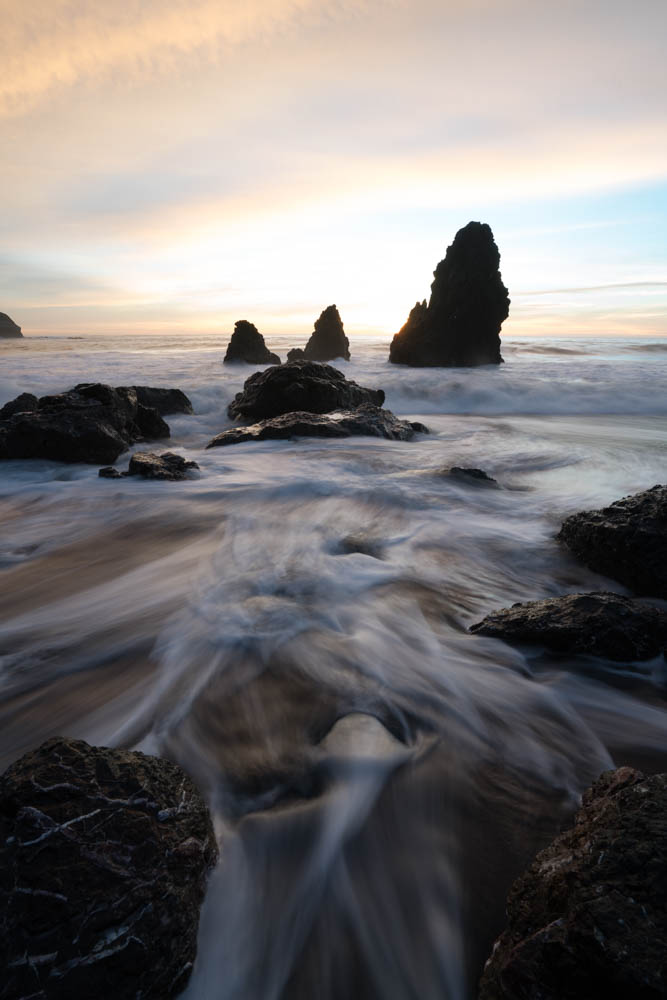
After looking over all the photos taken that night I selected the three shown above. One for the sunburst/sky and two for the water movement. The water in the foreground helps lead your eye to the sea stacks then out to the horizon. I start by applying basic edits like highlights/shadows, exposure balance, and some minor color adjustments to each of the images. I then export them out of Lightroom into photoshop as smart objects. Smart objects allows me to make micro adjustments once they are in a single file. Sometimes when you stack images you have to tweak the edits a little in order for them to blend correctly.
Once this is done I begin to work on adding more depth to the image by “painting light”. Creating both light and dark masks, I can target specific areas of the image to help move your eye through the scene. Lastly, there was a large blue hole that formed which distracted from the image. Using the clone tool I used various parts of the image to lightly fill that area in. I finished it off by cropping down and sharpening for various online outlets.
I hope you enjoyed this read and I look forward to sharing more posts like this!
Equipment used:
Sony a7rii
Sony 16-35f4
Induro ct-213 Carbon 8x
Adobe Lightroom/ Photoshop
-
February 2018
- Feb 20, 2018 Afternoon at UC Davis Feb 20, 2018
- Feb 2, 2018 Cooley Landing Education Center Feb 2, 2018
-
December 2017
- Dec 18, 2017 Szabo Ranch House drone footage Dec 18, 2017
-
November 2017
- Nov 28, 2017 Before & After- Twilight Photography Nov 28, 2017
-
September 2017
- Sep 12, 2017 About this Shot: Rodeo Star Sep 12, 2017
- Sep 1, 2017 Real Estate vs Architectural Photography Sep 1, 2017
-
August 2017
- Aug 23, 2017 About This Shot: Tufa Arrival Aug 23, 2017
-
April 2016
- Apr 13, 2016 Rhino Motion in Iceland Apr 13, 2016